Monday, 29 October 2012

Editing photos

Editing photos in adobe bridge 


Open Adobe Bridge and upload your photos to this. Once this is done find one that you want to edit  hold down ctrl and click open in camera raw.


This is what it should look like when this opens. 


Then edit the photo using the tools and the right hand side, changing exposure, contrast, brightness etc.

You can edit then tone by either using the sliders (left photo) or adding as many or few points as you want and moving the points to add different tones (right photo). 


Photo before adding vignetting.


Adding a dark vignetting 

Adding a light vignetting. 


I took the right down to -100 and put the mindpoint to +46.


Editing in photoshop 


 Open the image in photoshop and select the tool that looks like a plaster, this is called the healing tool.

 Once this tool had been selected I held down alt and clicked on the sky next to the spot that I wanted to be removed. Then once the right colour had been selected I then placed this over the black stop and it removed it. 

 I then did the same but to get rid of the black mark at the bottom, this was a bit harder as I had to get part of the line on the road.


 This is what the photo looks like without the black marks. 


 I then zoomed in and copied the amber on the traffic light and placed it where the red and green should be.


I then did the same but with the green colour.  
This is what it looked like at the end of my editing. 


Friday, 26 October 2012

Shutter speeds

Slow Shutter Speeds


I took my DSLR camera out around Liverpool town and tried many different shutter speeds and these are the photos I ended up with. I am pleased with most of them however some of them didn't work out how I wanted them to. I set my camera to shutter priority and adjusted the speeds depending on the shot I was taking.
 I used a shutter speed of 10 seconds and an aperture of F25(this set itself) to create this photo. This photo shows leading lines as your eyes follow the fountain.

Again, to achieve this photo I used  a shutter speed of 10 seconds and an aperture of F22(this set itself). This is my favourite image that I took, I like how there is the lower lights from the cars and the higher light from the bus.

For this photo the shutter speed was 13 seconds and aperture of F22(this set itself). In this photo I like how the yellow bus is still and then there is the lights from the moving cars, I also like the colour of the sky.

This was my first attempt at using slow shutter speeds and I wasn't happy with this image. The camera is pointing too high up and the cars don't have the sense of moving as I only used 2 second shutter.

This photo was set on 5 second shutter, I like how the wheel looks like it's moving really fast and the buildings and still.


This photo was on for 2 seconds, I don't like it as I don't like the lamp post in the corner.

 I like this photo because of the motion of the wheel and the still of the tree however I think that the motion looks too fast. This was on a shutter speed of 3.2 seconds.

So I did the photo again but on a speed of 2 seconds and think that it looks better.

This photo was on a speed for 13 seconds and I like this one because of all the colours of the sky and the very fast motion of the cars.

street photography

 Street photography

A key aspect of street photography is the sense that the captured scene is unplanned. Scenes that are pre-planned public events don't have the same feeling of spontaneity. That is not to say, that if a photographer knowingly attends an organised event he or she might not still be able to capture a spontaneous and unrelated street scene.

These are some of my street photography images that I took and then edited on Adobe Bridge. I added more contrast to all of these and changed the levels.

Security man in a shopping centre.

Old women shopping for their meats.


Man in his stall in a market.

Juxtaposition between the 'You Only Live Once' jumper and the old couple out shopping.

Family day out.
Stopping for a bite to eat.
A group of students out doing work.

When life was simple.

A little wellie boot, on the streets. This is my favourite street photography shot that I got. I like it as I think about the child and how sad they'd be as children love running around splashing in the water puddles.

Composition

Composition 

In photography there are no set rules however there are some rules that you can follow to help make your photos look more interesting. These rules are: 
Rule of thirds 
Leading lines 
Frame within a frame 
The triangle
The circle 
Rhythm
Negative space

Rule of thirds
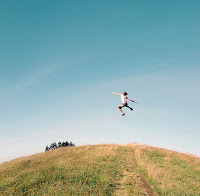
The rule of thirds is where you split your photo into 9 equal squares (2 lines horizontally and 2 vertically). This rule says that you should place the most important elements along these lines or at the points where they meet. 
Leading lines
When looking at photos our eyes naturally follow lines, using leading lines will help draw the viewer to where you want them to look at.


Frame within a frame
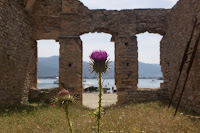
Framing within your frame can help to focus your image and draws your eye naturally to the main subject. Things that can be used are things like trees, archways and hole.


The Triangle

Different landmarks can be one of three points that form the triangle. For example, a person at the foreground of the photo is the first point, a boat behind the person forms the second point, and an island on the other side of the frame to give the third point. As long as no other objects are in the frame, the eye can easily follow the photo from the person, to the boat, to the island, this is adding dynamic to the photo.

The circle
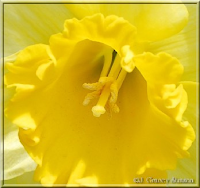
The circular composition is normally very effective for close up, macro and abstract photos. For all of these types of images you usually get fairly close to the subject. That doesn't mean you can't still use one of the other rules, but in filling the frame with a photo like a rose, or daisy, the circular composition can be a good choice. Circular can also take the form of an oval, or ellipse


Rhythm
Another way to create dynamic in your photos is to use rhythm, this is the use of repetition of form and shape


Negative Space
Negative space is the 'less is more' approach, this just means that the main subject is only taking up a small section of the photo.


Adding these rules to your photographs will make for more dynamic and creative photos.

Wednesday, 10 October 2012

Depth of field

Depth of field 


Depth of field is the range of distance that appears is focus or blurred in a photograph. We define depth of field as the zone of sharpest focus in front of, behind, and around the subject a lens is focused on a specific subject. With TTL (through the lens) SLR camera, DOF can be previewed in the viewfinder of a camera - the preview is very handy for critical type of work. For an example, when taking a product shot, when you require absolute certain if DOF is adequate to cover the object you intend to photograph Generally, the closer the subject to the camera, the more evenly with the distribution of depth of field in front and behind the subject. As distance of focus extends, DOF usually will be more behind than in front of the focused area.


This photo shows narrow depth of field, this means that things in the foreground are in focus and things in the background are out out focus or blurred. 

This is wide depth of field as everything in the photo is in focus, this is achieved by using a small aperture and long shutter speeds. This means that you most likely would have to use a tripod, wide DOF is mainly used for landscape photography.
  • The closer the object is to the camera, the more shallow the depth of field you'll get.
  • The longer the focal length, it'll give more shallow the depth of field.
  • The larger the aperture (smaller the F-number), the more shallow the depth of field.
It is important to understand how to affect the depth of field in order to use it in image composition. Shallow depth of field is usually used in portraits and large depth of field is usually used in landscape photos.


Tuesday, 9 October 2012

Lee Friedlander

Lee Friedlander


Lee Friedlander, born in 1934, began taking photos of the American social landscape in 1948. Friedlander was able to organize a many visual objects in dynamic composition, Friedlander has made astonishing images among the chaos of city life, landscapes and countless other subjects. Friedlander is also recognized for a group of self-portraits he began in the 1960s, an exploration that he turned to again in the late 1990s, and published in a monograph by Fraenkel Gallery in 2000.

Fridlander mainly worked with Leica 35mm cameras and black and white film, his style focused on the "social landscape". His art used images of urban life, window reflections, structures framed by fences, posters and signs all combining to give the look of modern life.


He did many in this format/series, it gives each photo a different edge about it. Each photo has reflection and some even have a natural border from the car window, these add to the photos by making the viewer look at the image differently. He also uses good perspective, as in many of the images there are vanishing points, or forced perspective eg the car in the bottom left photo.